Novelty Kafka Quickstart
Overview
Novelty shines as a stream processor. It excels in scenarios where you can stream observations into Novelty, and can receive flowing observations results from Novelty.
In this quickstart, you will:
- Spin up Novelty via Helm and a minimal Kafka cluster in Kubernetes.
- Create a test transformation and bidirectional Kafka stream with Novelty’s Interactive Docs.
- Produce sample observations and watch scored results flow into a Kafka topic.
By the end you will have a working Kafka → Novelty → Kafka pipeline you can adapt to your own data.
Prerequisites
kubectlconfigured for the target cluster- Helm must be installed to use the charts. Please refer to Helm's documentation to get started.
- A Kubernetes cluster will be needed to deploy Kafka and Novelty in this quickstart.
- Obtained a Novelty license key.
Installing Novelty and Kafka
This quickstart installs Novelty with its Helm chart, and runs Kafka from the apache/kafka image with a Kubernetes manifest.
Novelty Helm Values (novelty-values.yaml)
Use this as your Novelty helm values with your license key secret and the Novelty image (see Helm Quick Start for instructions on creating the license key secret and the thatdot-registry pull secret):
licenseKeySecret:
  name: <YOUR_LICENSE_SECRET_NAME>
  key: <YOUR_LICENSE_SECRET_KEY>

image:
  repository: registry.license.thatdot.com/thatdot/novelty
  tag: "1.2.0"
The Novelty chart does not add the pull secret to its pods, so the install script below attaches it to the namespace's default service account first.
Kafka Manifest (kafka.yaml)
Save this manifest as kafka.yaml. It runs a single Kafka broker that is also its own controller, behind a Service named kafka that accepts PLAINTEXT connections on port 9092:
apiVersion: v1
kind: Service
metadata:
  name: kafka
spec:
  selector:
    app: kafka
  ports:
    - name: client
      port: 9092
---
apiVersion: apps/v1
kind: StatefulSet
metadata:
  name: kafka
spec:
  serviceName: kafka
  replicas: 1
  selector:
    matchLabels:
      app: kafka
  template:
    metadata:
      labels:
        app: kafka
    spec:
      # The image reads every KAFKA_* variable as a broker setting, so keep
      # Kubernetes from adding its KAFKA_SERVICE_* and KAFKA_PORT* variables.
      enableServiceLinks: false
      containers:
        - name: kafka
          image: apache/kafka:4.4.0
          ports:
            - containerPort: 9092
          env:
            - name: KAFKA_NODE_ID
              value: "1"
            - name: KAFKA_PROCESS_ROLES
              value: broker,controller
            - name: KAFKA_LISTENERS
              value: PLAINTEXT://:9092,CONTROLLER://:9093
            - name: KAFKA_ADVERTISED_LISTENERS
              value: PLAINTEXT://kafka:9092
            - name: KAFKA_LISTENER_SECURITY_PROTOCOL_MAP
              value: CONTROLLER:PLAINTEXT,PLAINTEXT:PLAINTEXT
            - name: KAFKA_INTER_BROKER_LISTENER_NAME
              value: PLAINTEXT
            - name: KAFKA_CONTROLLER_LISTENER_NAMES
              value: CONTROLLER
            - name: KAFKA_CONTROLLER_QUORUM_VOTERS
              value: 1@localhost:9093
            - name: KAFKA_OFFSETS_TOPIC_REPLICATION_FACTOR
              value: "1"
            - name: KAFKA_TRANSACTION_STATE_LOG_REPLICATION_FACTOR
              value: "1"
            - name: KAFKA_TRANSACTION_STATE_LOG_MIN_ISR
              value: "1"
            - name: KAFKA_SHARE_COORDINATOR_STATE_TOPIC_REPLICATION_FACTOR
              value: "1"
            - name: KAFKA_SHARE_COORDINATOR_STATE_TOPIC_MIN_ISR
              value: "1"
            - name: KAFKA_GROUP_INITIAL_REBALANCE_DELAY_MS
              value: "0"
            - name: KAFKA_LOG_DIRS
              value: /tmp/kraft-combined-logs
          readinessProbe:
            tcpSocket:
              port: 9092
Bash script to install Kafka and Novelty
helm repo add thatdot https://helm.thatdot.com
helm repo update

kubectl apply -f kafka.yaml

kubectl patch serviceaccount default \
  -p '{"imagePullSecrets": [{"name": "thatdot-registry"}]}'

helm upgrade --install \
  novelty thatdot/novelty \
  -f novelty-values.yaml
Running this script starts Kafka and installs the Novelty Helm chart.
Ensuring Deployments are Ready
Let's use kubectl to ensure that both Novelty and Kafka are ready to serve our requests.
Use kubectl to list all the pods deployed into our current namespace. We should see Novelty and Kafka
kubectl get pods
NAME                       READY   STATUS    RESTARTS   AGE
kafka-0                    1/1     Running   0          22s
novelty-66d464fd5b-qkbpb   1/1     Running   0          21s
If they aren't all in a ready state, wait a minute or two and try again.
Port-forward to Novelty and Establish Kafka stream with Interactive Docs
We will now port-forward to Novelty, and then use its Interactive Docs to create a simple transformation, along with creating a new stream that will consume data from Kafka, transform it with our transformation, score the observation results, and then stream them back to Kafka.
Kafka -> Novelty -> Kafka
To open up a port-forward to Novelty, use the following command in a spare terminal. Keep this terminal up as we explore with Novelty's Interactive Docs:
kubectl port-forward deployments/novelty 8080
After that, navigate to Novelty at localhost:8080

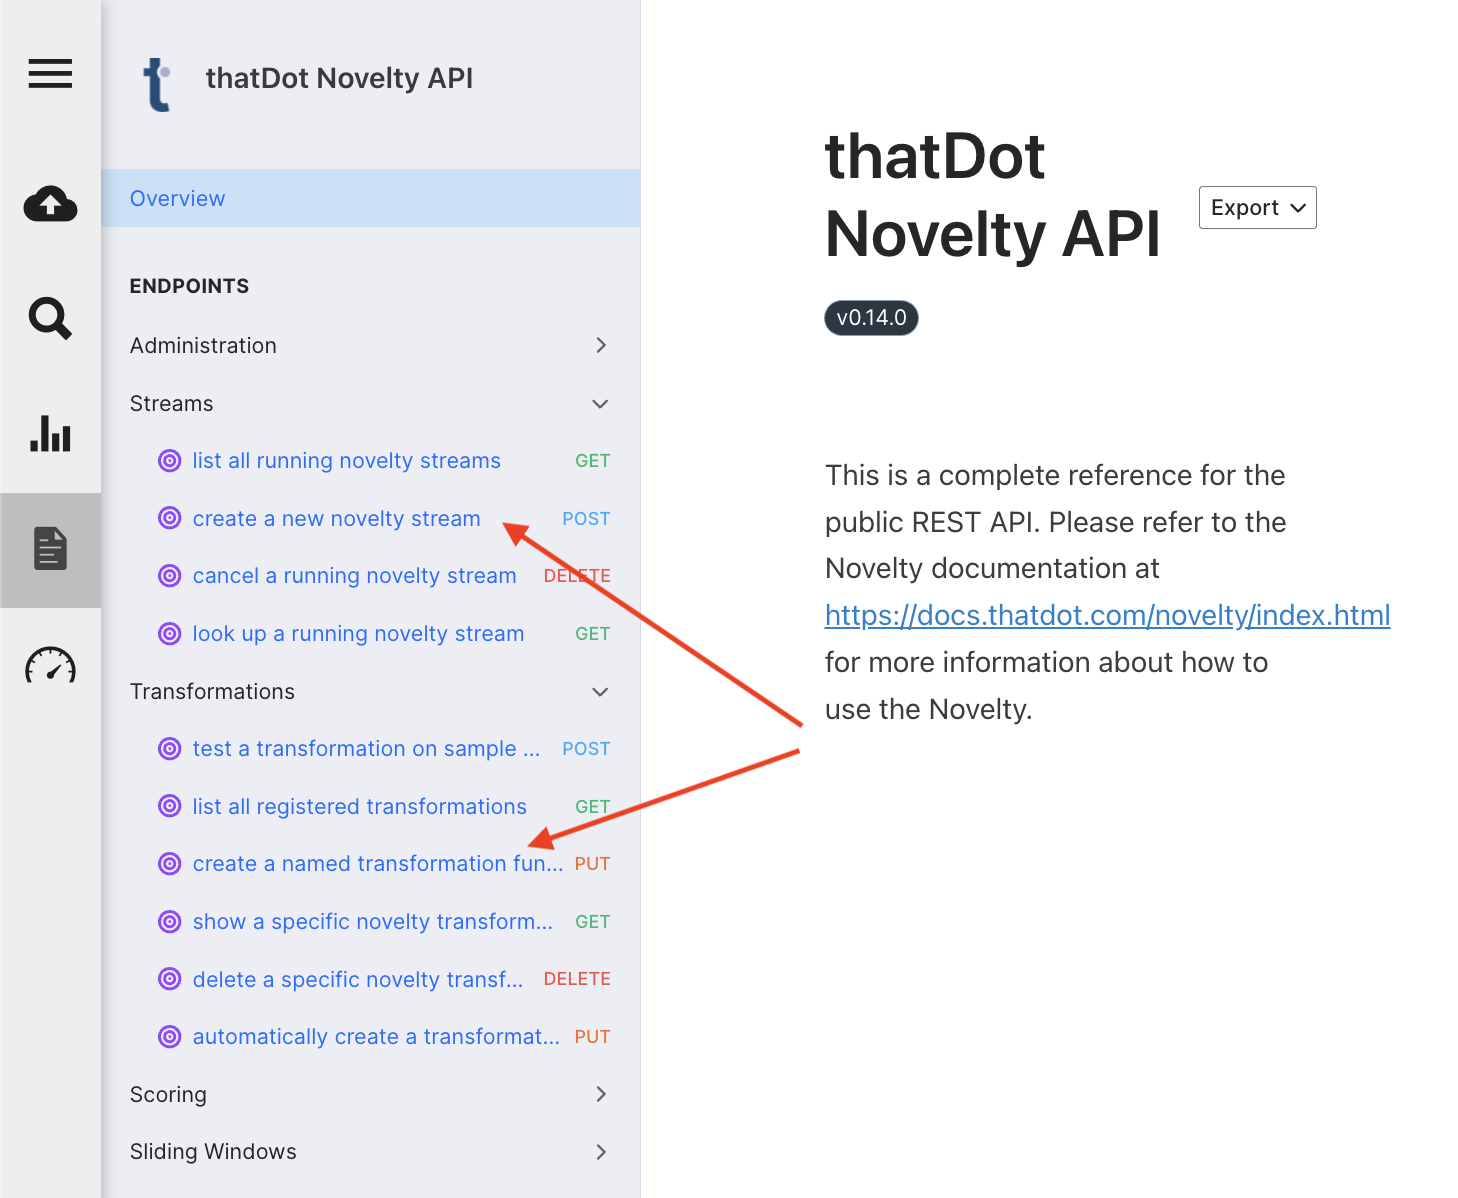
After loading up Novelty in your browser, click on the Interactive Docs button on the left navigation. This quickstart uses three operations to create the Kafka stream:
- Create Model:
POST /api/v2/system/models - Create Transformation Function:
POST /api/v2/model/{modelName}/transformations - Create Novelty Stream:
POST /api/v2/model/{modelName}/ingests
Create a model
Before creating a transformation or stream, you must create a model. In Interactive Docs, open Create Model and its TryIt tab, enter a model name such as kafkademo as the request body, and click the blue "Send API Request" button. See Core Concepts for the model naming rules.
Create a named transformation
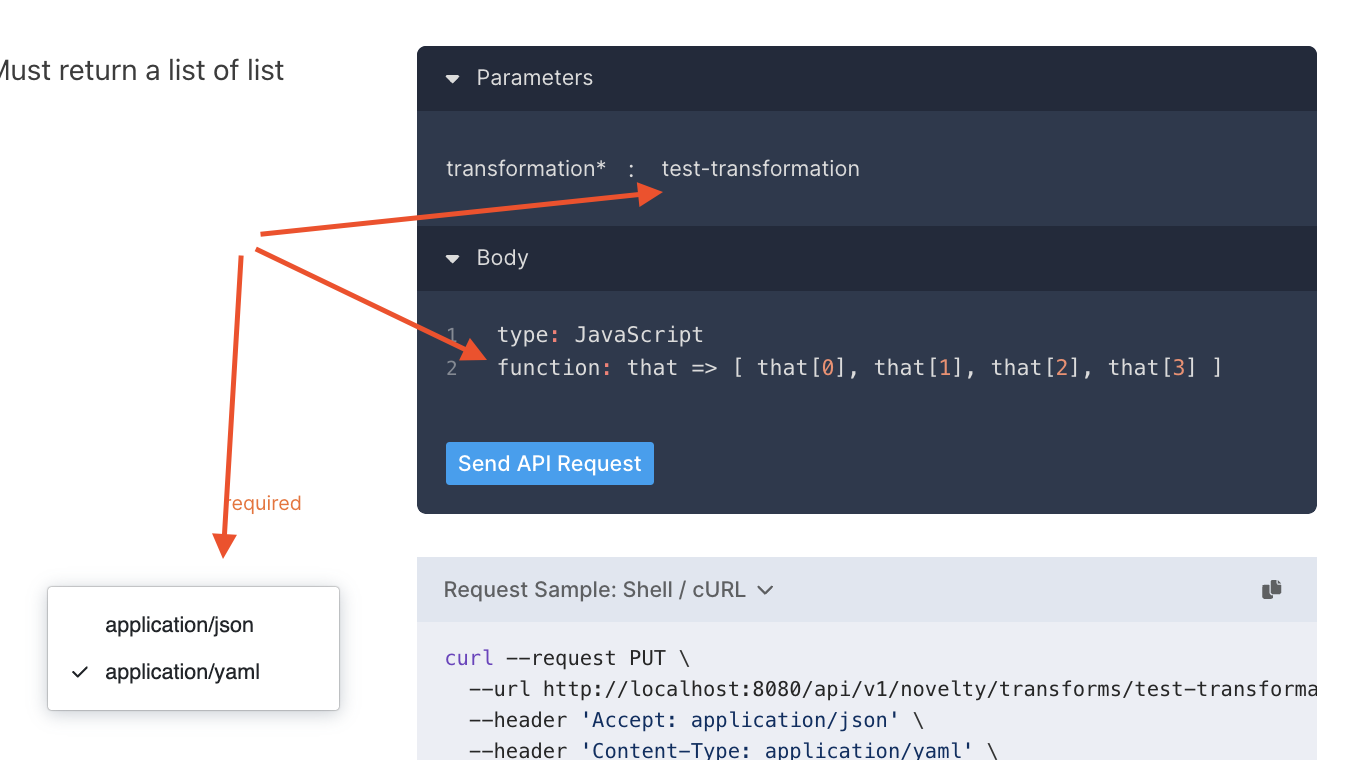
In Interactive Docs, open Create Transformation Function and stay on its Docs tab, because the TryIt tab has no body type menu and always sends JSON. In the Body section, set the body type to application/yaml. The request panel on the right and the curl sample switch to Content-Type: application/yaml. In that panel, enter kafkademo as the modelName, and paste this sample transformation, named test-transformation, into the body:
name: test-transformation
type: JavaScript
function: that => [ that[0], that[1], that[2], that[3] ]
After that, click the blue "Send API Request" button to create that transformation.
Create a new Novelty stream
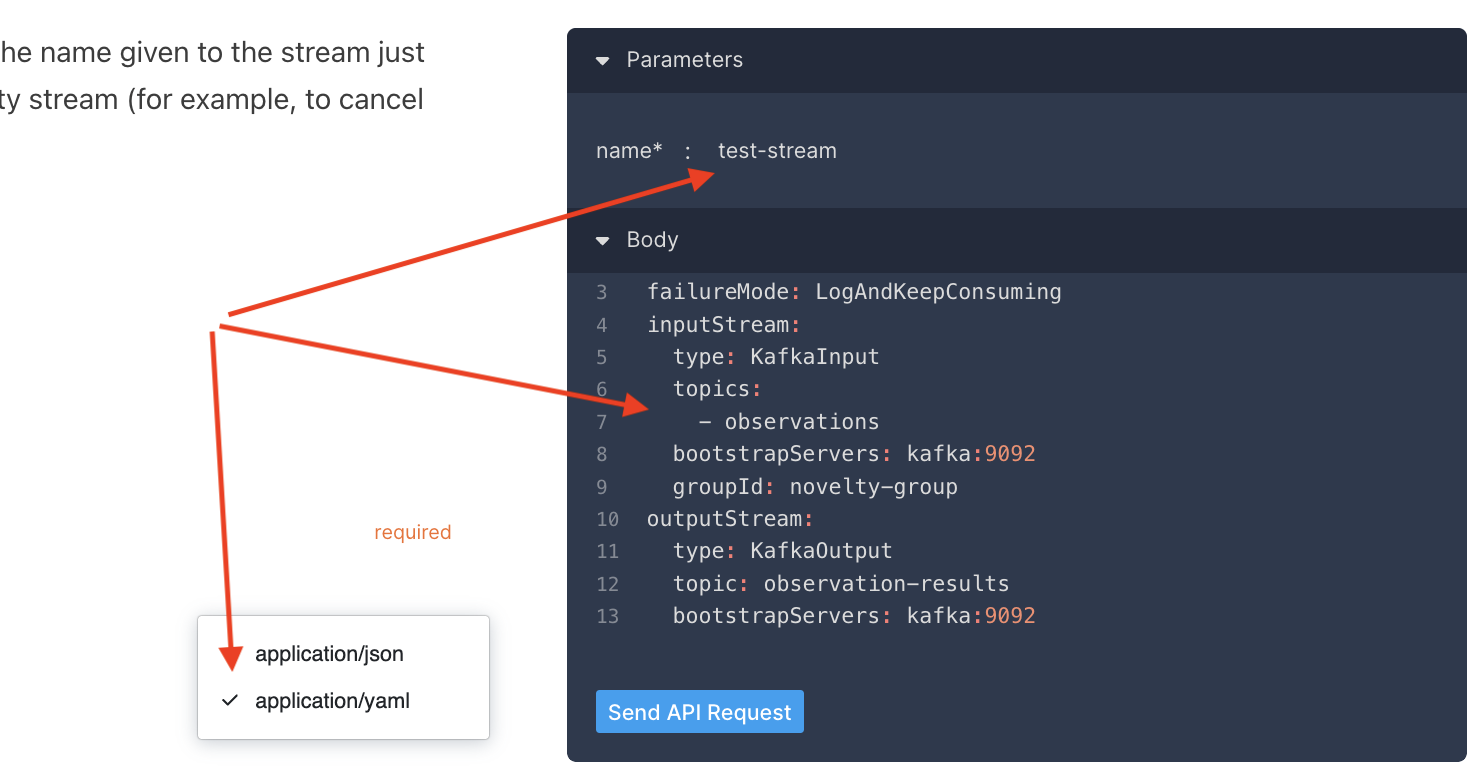
Once you've created a transformation, you can create a Novelty stream. In Interactive Docs, open Create Novelty Stream on its Docs tab and set the body type in the Body section to application/yaml. In the request panel, enter kafkademo as the modelName, and paste this stream configuration, named test-stream, into the body. It reads JSON records from the observations topic and publishes each observation result to the observation-results topic:
name: test-stream
transformation: test-transformation
source:
  type: Kafka
  topics:
    - observations
  bootstrapServers: kafka:9092
  groupId: novelty-group
  format:
    type: Json
outputWorkflow:
  destinations:
    - type: Kafka
      topic: observation-results
      bootstrapServers: kafka:9092
After that, click the blue "Send API Request" button to create the new Novelty Kafka stream.
Produce Observations to Kafka, Consume Observations Results from Kafka
Now that we've established a Kafka stream in Novelty, we can stop our port-forward since we will be interactive with Kafka now. We will open two shells in the Kafka pod, one to create a producer and produce some sample observations, and a consumer to see those observations scored in real time.
Create 2 terminals, and in each, use this command to open a shell in the Kafka pod:
kubectl exec -it kafka-0 -- bash
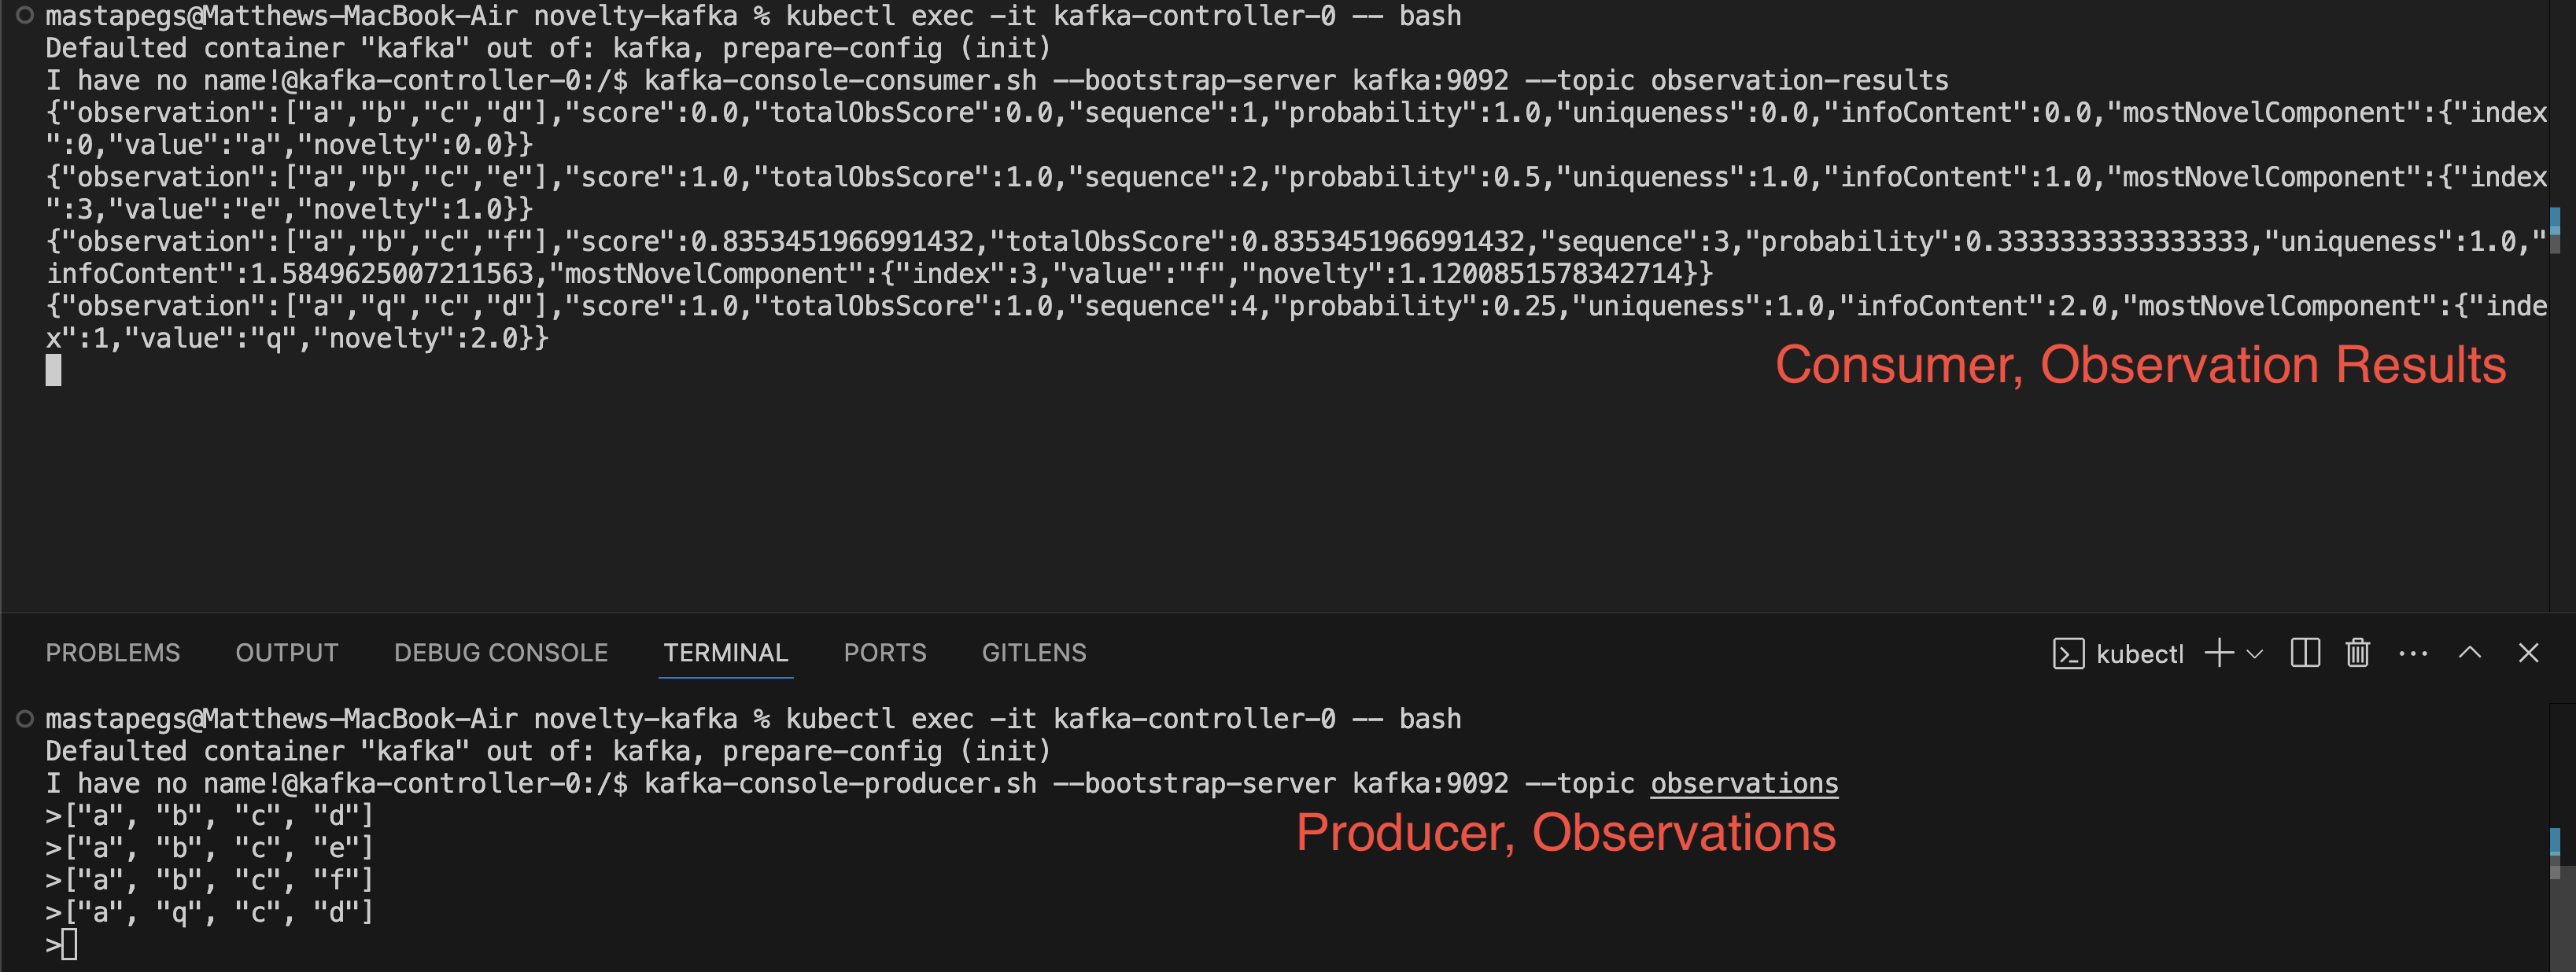
In one of those terminals, consume from the observation-results with this command:
/opt/kafka/bin/kafka-console-consumer.sh --bootstrap-server kafka:9092 --topic observation-results
When it starts, the consumer may print an UNKNOWN_TOPIC_OR_PARTITION warning while Kafka creates the observation-results topic. The warning is harmless.
In the other terminal, prepare to produce some sample observations with this command:
/opt/kafka/bin/kafka-console-producer.sh --bootstrap-server kafka:9092 --topic observations
After that, the shell will wait for you to enter newline delimited messages to Kafka. Our transformation is expecting an array of 4 strings, so we will send some extremely basic observations, to assert a working Novelty stream.
Send the following messages to Kafka, and you should observe scored observation results flowing out of the observation-results topic we are consuming from
["a", "b", "c", "d"]["a", "b", "c", "e"]["a", "b", "c", "f"]["a", "q", "c", "d"]
Summary
This quickstart showed how to provision Novelty and a simple Kafka deployment, to test out streaming data in and out of Novelty. Once you've established this steel-thread, you can expand upon it, and feed data for your use-case into Kafka, and mold your transformation so that it creates observations from your data that help answer your questions as you look for anomalous behavior in your data.
Production Security
This quickstart uses Kafka's PLAINTEXT protocol (no encryption or authentication) for simplicity. For production deployments, configure SASL_SSL security using the saslJaasConfig and SSL password parameters. These credentials are automatically redacted in API responses. See the Streaming Systems documentation for secure configuration examples.